Yes, the microphone also has other uses, but you first need to set up and test it for a better audio experience. To deal with microphone-related problems, Windows 11 offers you a Microphone testing tool. Also read: How to Enable Fast Startup On Windows 11
Steps to Test & Adjust Your Microphone on Windows 11
If your microphone is too loud, too quiet, or not working, there’s a handy way to test the audio input device and its level in Windows 11. Hence, in this article, we will share a step-by-step guide on testing your microphone on Windows 11. Important: Before following the steps, ensure that the microphone you want to test is connected to your PC.
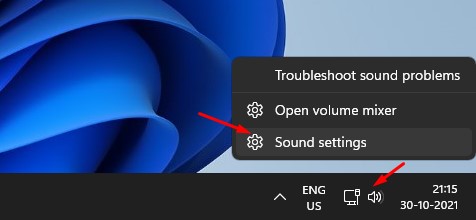
First, right-click on the sound icon in the system tray and select Sound Settings.
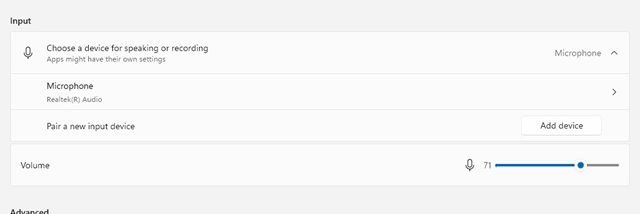
This will open the Sound settings page. On that page, scroll down and find the Input section.
Now, click on the arrow button behind the microphone, as shown in the screenshot below.
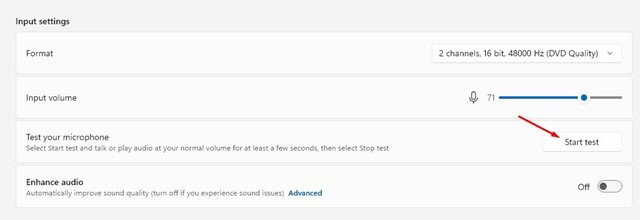
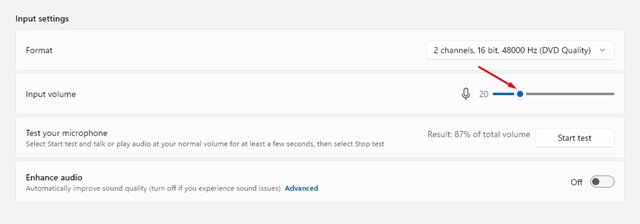
On the next screen, click on the Start test button behind the Test your Microphone.
If the Microphone is working correctly, you will see a blue bar on the Input Volume slider moving from left to right as you talk.
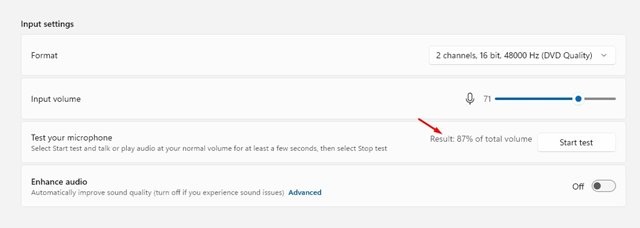
When the test is complete, you will find the result behind the Start test button.
The ideal result to achieve in the Microphone test is 75%. Anything less than 50% means too quiet.
For example, if your microphone is too quiet, click on the Input Volume slider and increase the volume. Similarly, if your microphone is too loud, you need to decrease the volume.
That’s it! You are done. After making the changes, you can click on the Start test button again to test your microphone again. So, this guide is all about how to test your Microphone on Windows 11. I hope this article helped you! Please share it with your friends also. If you have any doubts related to this, let us know in the comment box below.
